Flutter Sound is a Flutter package allowing you to play and record audio for :
Android
iOS
Flutter Web
Maybe, one day, we will be supported by Linux, Macos, and even (why not) Windows. But this is not top of our priorities.
Flutter Sound provides both a high level API and widgets for:
play audio
record audio
Flutter Sound can be used to play a beep from an asset all the way up to implementing a complete media player.
The API is designed so you can use the supplied widgets or roll your own.
The Flutter Sound package includes the following features
Play and Record flutter sound or music with various codecs.
Play local or remote files specified by their URL.
Play assets.
You can find the
The
Flutter Sound is copyrighted by Dooboolab (2018, 2019, 2020). Flutter Sound is released under a license with a copyleft clause: the LGPL-V3 license. This means that if you modify some of Flutter Sound code you must publish your modifications under the LGPL license too.
Flutter Sound is a fundamental building block needed by almost every flutter project.
I'm looking to make Flutter Sound the go to project for Flutter Audio with support for each of the Flutter supported platforms.
Flutter Sound is a large and complex project which requires me to maintain multiple hardware platforms and test environments.
We greatly appreciate any contributions to the project which can be as simple as providing feedback on the API or documentation.
My friend Hyo has been maintaining quite many repos these days and he is burning out slowly. If you could help him cheer up, buy him a cup of coffee will make his life really happy and get much energy out of it. As a side effect, we will know that Flutter Sound is important for you, that you appreciate our job and that you can show it with a little money.
pages
Play audio using the built in SoundPlayerUI Widget.
Roll your own UI utilising the Flutter Sound api.
Record audio using the builtin SoundRecorderUI Widget.
Roll your own Recording UI utilising the Flutter Sound api.
Support for releasing/resuming resources when the app pauses/resumes.
Record to a Dart Stream
Playback from a Dart Stream
The App playback can be controled from the device lock screen or from an Apple watch
Use this verb to play data from a track specification and display controls on the lock screen or an Apple Watch. The Audio Session must have been open with the parameter withUI.
track parameter is a simple structure which describe the sound to play. Please see
whenFinished:() : A function for specifying what to do when the playback will be finished.
onPaused:() : this parameter can be :
a call back function to call when the user hit the Skip Pause button on the lock screen
null : The pause button will be handled by Flutter Sound internal
onSkipForward:() : this parameter can be :
a call back function to call when the user hit the Skip Forward button on the lock screen
null : The Skip Forward button will be disabled
onSkipBackward:() : this parameter can be :
a call back function to call when the user hit the Skip Backward button on the lock screen
: The Skip Backward button will be disabled
removeUIWhenStopped : is a boolean to specify if the UI on the lock screen must be removed when the sound is finished or when the App does a stopPlayer(). Most of the time this parameter must be true. It is used only for the rare cases where the App wants to control the lock screen between two playbacks. Be aware that if the UI is not removed, the button Pause/Resume, Skip Backward and Skip Forward remain active between two playbacks. If you want to disable those button, use the API verb nowPlaying(). Remark: actually this parameter is implemented only on iOS.
defaultPauseResume : is a boolean value to specify if Flutter Sound must pause/resume the playback by itself when the user hit the pause/resume button. Set this parameter to FALSE if the App wants to manage itself the pause/resume button. If you do not specify this parameter and the onPaused parameter is specified then Flutter Sound will assume FALSE. If you do not specify this parameter and the onPaused parameter is not specified then Flutter Sound will assume TRUE. Remark: actually this parameter is implemented only on iOS.
startPlayerFromTrack() returns a Duration Future, which is the record duration.
The stream side of the Food Controller : this is a stream on which FlutterSound will post the player progression. You may listen to this Stream to have feedback on the current playback.
The sink side of the Food Controller that you use when you want to play asynchronously live data. This StreamSink accept two kinds of objects :
FoodData (the buffers that you want to play)
FoodEvent (a call back to be called after a resynchronisation)
Example:
shows how to play Live data, without Back Pressure from Flutter Sound
</div>
The τ Player API
setUIProgressBar()
Dart API: .
This verb is used if the App wants to control itself the Progress Bar on the lock screen. By default, this progress bar is handled automaticaly by Flutter Sound. Remark setUIProgressBar() is implemented only on iOS.
This four verbs is used when the app wants to get the current Audio State of the player.
playerState is an attribut which can have the following values :
isStopped /// Player is stopped
isPlaying /// Player is playing
isPaused /// Player is paused
Flutter Sound shows in the playerState attribut the last known state. When the Audio State of the background OS engine changes, the playerState parameter is not updated exactly at the same time. If you want the exact background OS engine state you must use PlayerState theState = await myPlayer.getPlayerState(). Acutually getPlayerState() is only implemented on iOS.
Example:
</div>
The τ Player API
Food.
Dart API: .
Dart API: .
Dart API: .
The τ Player API
resumePlayer()
Dart API: .
Use this verbe to resume the current playback. An exception is thrown if the player is not in the "paused" state.
Example:
_site
isPlaying is a boolean attribut which is true when the player is in the "Playing" mode.
isPaused is a boolean atrribut which is true when the player is in the "Paused" mode.
isStopped is a boolean atrribut which is true when the player is in the "Stopped" mode.
This verb is used to set the Lock screen fields without starting a new playback. The fields 'dataBuffer' and 'trackPath' of the Track parameter are not used. Please refer to 'startPlayerFromTrack' for the meaning of the others parameters. Remark setUIProgressBar() is implemented only on iOS.
Example:
The τ Player API
isDecoderSupported()
Dart API: .
This verb is useful to know if a particular codec is supported on the current platform. Returns a Future.
Example:
</div>
if ( await myPlayer.isDecoderSupported(Codec.opusOGG) ) doSomething;
This verb is used to change the default interval between two post on the "Update Progress" stream. (The default interval is 0 (zero) which means "NO post")
startPlayer() has three optional parameters, depending on your sound source :
fromUri: (if you want to play a file or a remote URI)
fromDataBuffer: (if you want to play from a data buffer)
sampleRate is mandatory if codec
You must specify one or the three parameters : fromUri, fromDataBuffer, fromStream.
You use the optional parametercodec: for specifying the audio and file format of the file. Please refer to the to know which codecs are currently supported.
whenFinished:() : A lambda function for specifying what to do when the playback will be finished.
Very often, the codec: parameter is not useful. Flutter Sound will adapt itself depending on the real format of the file provided. But this parameter is necessary when Flutter Sound must do format conversion (for example to play opusOGG on iOS).
startPlayer() returns a Duration Future, which is the record duration.
Hint: can be useful if you want to get access to some directories on your device.
Example:
</div>
Example:
</div>
The τ Player API
getProgress()
Dart API: .
This verb is used to get the current progress of a playback. It returns a Map with two Duration entries : 'progress' and 'duration'. Remark : actually only implemented on iOS.
Example:
The τ Player API
The τ player API.
Dart API: .
This is the first thing to do, if you want to deal with playbacks. The instanciation of a new player does not do many thing. You are safe if you put this instanciation inside a global or instance variable initialization.
Use this verb to stop a playback. This verb never throw any exception. It is safe to call it everywhere, for example when the App is not sure of the current Audio State and want to recover a clean reset state.
    final fileUri = "https://file-examples.com/wp-content/uploads/2017/11/file_example_MP3_700KB.mp3";

    Duration d = await myPlayer.startPlayer
    (
                fromURI: fileUri,
                codec: Codec.mp3,
                whenFinished: ()
                {
                         print( 'I hope you enjoyed listening to this song' );
                },
    );
Lorem ipsum ...
Lorem ipsum ...
Lorem ipsum ...
The τ Player API
`openAudioSession()` and `closeAudioSession()`.
Dart API: .
Dart API: .
A player must be opened before used. A player correspond to an Audio Session. With other words, you must open the Audio Session before using it. When you have finished with a Player, you must close it. With other words, you must close your Audio Session. Opening a player takes resources inside the OS. Those resources are freed with the verb closeAudioSession()
τ under React Native
Not yet. Please come back later.
. It is safe to call this procedure at any time.
If the Player is not open, this verb will do nothing
If the Player is currently in play or pause mode, it will be stopped before.
focus is an optional parameter can be specified during the opening : the Audio Focus. This parameter can have the following values :
AudioFocus.requestFocusAndStopOthers (your app will have exclusive use of the output audio)
AudioFocus.requestFocusAndDuckOthers (if another App like Spotify use the output audio, its volume will be lowered)
AudioFocus.requestFocusAndKeepOthers (your App will play sound above others App)
AudioFocus.doNotRequestFocus (useful if you want to mangage yourself the Audio Focus with the verb setAudioFocus())
The Audio Focus is abandoned when you close your player. If your App must play several sounds, you will probably open your player just once, and close it when you have finished with the last sound. If you close and reopen an Audio Session for each sound, you will probably get unpleasant things for the ears with the Audio Focus.
category is an optional parameter used only on iOS. This parameter can have the following values :
is a boolean that you set to true if you want to control your App from the lock-screen (using startPlayerFromTrack() during your Audio Session).
You MUST ensure that the player has been closed when your widget is detached from the UI. Overload your widget's dispose() method to closeAudioSession the player when your widget is disposed. In this way you will reset the player and clean up the device resources, but the player will be no longer usable.
You may not open many Audio Sessions without closing them. You will be very bad if you try something like :
openAudioSession() and closeAudioSession() return Futures. You may not use your Player before the end of the initialization. So probably you will await the result of openAudioSession(). This result is the Player itself, so that you can collapse instanciation and initialization together with myPlayer = await FlutterSoundPlayer().openAudioSession();
    while (aCondition)  // *DON'T DO THAT*
    {
            flutterSound = FlutterSoundPlayer().openAudioSession(); // A **new** Flutter Sound instance is created and opened
            flutterSound.startPlayer(bipSound);
    }
You do not need to instanciate the Flutter Sound Helper module. To use this module, you can just use the singleton offers by the module : flutterSoundHelper.
This functionnality needs, at least, and Android SDK >= 21
The only codec supported is actually Codec.pcm16.
The only value possible for numChannels is actually 1.
SampleRate is the sample rate of the data you want to play.
Please look to
Example You can look to the three provided examples :
shows how to play Live data, with Back Pressure from Flutter Sound
shows how to play Live data, without Back Pressure from Flutter Sound
shows how to play some real time sound effects.
Example 1:
</div>
Example 2:
</div>
The τ Player API
feedFromStream().
Dart API: .
This is the verb that you use when you want to play live PCM data synchronously. This procedure returns a Future. It is very important that you wait that this Future is completed before trying to play another buffer.
Example:
The τ Recorder API
setSubscriptionDuration()
Dart API:
This verb is used to change the default interval between two post on the "Update Progress" stream. (The default interval is 0 (zero) which means "NO post")
Example:
The τ Recorder API
setAudioFocus()
Dart API:
AudioFocus.requestFocus (request focus, but do not do anything special with others App)
AudioFocus.requestFocusAndStopOthers (your app will have
Duration t = await flutterSoundHelper.duration(aPathFile);
You use startRecorder() to start recording in an open session. startRecorder() has the destination file path as parameter. It has also 7 optional parameters to specify :
codec: The codec to be used. Please refer to the to know which codecs are currently supported.
toFile: a path to the file being recorded
toStream: if you want to record to a Dart Stream. Please look to . This new functionnality needs, at least, Android SDK >= 21 (23 is better)
sampleRate: The sample rate in Hertz
numChannels: The number of channels (1=monophony, 2=stereophony)
bitRate: The bit rate in Hertz
audioSource : possible value is :
defaultSource
microphone
can be useful if you want to get access to some directories on your device.
Flutter Sound does not take care of the recording permission. It is the App responsability to check or require the Recording permission. is probably useful to do that.
Example:
</div>
The τ Recorder API
`openAudioSession()` and `closeAudioSession()`
Dart API:
Dart API:
A recorder must be opened before used. A recorder correspond to an Audio Session. With other words, you must open the Audio Session before using it. When you have finished with a Recorder, you must close it. With other words, you must close your Audio Session. Opening a recorder takes resources inside the OS. Those resources are freed with the verb closeAudioSession()
The τ Recorder API
resumeRecorder()
Dart API:
On Android this API verb needs al least SDK-24. An exception is thrown if the Recorder is not currently paused.
Example:
The τ Recorder API
onProgress
Dart API:
The attribut onProgress is a stream on which FlutterSound will post the recorder progression. You may listen to this Stream to have feedback on the current recording.
Example:
utilities
isRecording is a boolean attribut which is true when the recorder is in the "Recording" mode.
isPaused is a boolean atrribut which is true when the recorder is in the "Paused" mode.
isStopped is a boolean atrribut which is true when the recorder is in the "Stopped" mode.
Use this verb to stop a record. This verb never throws any exception. It is safe to call it everywhere, for example when the App is not sure of the current Audio State and want to recover a clean reset state.
        if ( await flutterSoundHelper.isFFmpegAvailable() )
        {
                Duration d = flutterSoundHelper.duration("$myFilePath/bar.wav");
        }
Lorem ipsum ...
</div>
.
You MUST ensure that the recorder has been closed when your widget is detached from the UI. Overload your widget's dispose() method to close the recorder when your widget is disposed. In this way you will reset the player and clean up the device resources, but the recorder will be no longer usable.
You maynot openAudioSession many recorders without releasing them. You will be very bad if you try something like :
openAudioSession() and closeAudioSession() return Futures. You may not use your Recorder before the end of the initialization. So probably you will await the result of openAudioSession(). This result is the Recorder itself, so that you can collapse instanciation and initialization together with myRecorder = await FlutterSoundPlayer().openAudioSession();
The four optional parameters are used if you want to control the Audio Focus. Please look to FlutterSoundPlayer openAudioSession() to understand the meaning of those parameters
        switch(myRecorder.recorderState)
        {
                case RecorderState.isRecording: doSomething; break;
                case RecorderState.isStopped: doSomething; break;
                case RecorderState.isPaused: doSomething; break;
        }
        ...
        if (myRecorder.isStopped) doSomething;
        if (myRecorder.isRecording) doSomething;
        if (myRecorder.isPaused) doSomething;
Lorem ipsum ...
    // Request Microphone permission if needed
    PermissionStatus status = await Permission.microphone.request();
    if (status != PermissionStatus.granted)
            throw RecordingPermissionException("Microphone permission not granted");

    Directory tempDir = await getTemporaryDirectory();
    File outputFile = await File ('${tempDir.path}/flutter_sound-tmp.aac');
    await myRecorder.startRecorder(toFile: outputFile.path, codec: t_CODEC.CODEC_AAC,);
    while (aCondition)  // *DO'NT DO THAT*
    {
            flutterSound = FlutterSoundRecorder().openAudioSession(); // A **new** Flutter Sound instance is created and opened
            ...
    }
    myRecorder = await FlutterSoundRecorder().openAudioSession();

    ...
    (do something with myRecorder)
    ...

    myRecorder.closeAudioSession();
    myRecorder = null;
Lorem ipsum ...
Lorem ipsum ...
Flutter Sound Helpers API
waveToPCMBuffer()
Dart API:
This verb is usefull to convert a Wave buffer to a Raw PCM buffer. Note that this verb is not asynchronous and does not return a Future.
It removes the Wave envelop from the PCM buffer.
Example:
Flutter Sound Helpers API
pcmToWave()
Dart API:
This verb is usefull to convert a Raw PCM file to a Wave file.
It adds a Wave envelop to the PCM file, so that the file can be played back with startPlayer().
Note: the parameters numChannels
Flutter Sound Helpers API
getLastFFmpegReturnCode()
Dart API:
This simple verb is used to get the result of the last FFmpeg command
This verb is useful to convert a sound file to a new format.
infile is the file path of the file you want to convert
SoundPlayerUI
UIPlayer
First import the modules import 'flutter_sound.dart
The SoundPlayerUI provides a Playback widget styled after the HTML 5 audio player.
The player displays a loading indicator and allows the user to pause/resume/skip via the progress bar.
You can also pause/resume the player via an api call to SoundPlayerUI's state using a GlobalKey.
The SoundPlayerUI widget allows you to playback audio from multiple sources:
Flutter Sound Helpers API
executeFFmpegWithArguments()
Dart API:
This verb is a wrapper for the great FFmpeg application. The command "man ffmpeg" (if you have installed ffmpeg on your computer) will give you many informations. If you do not have ffmpeg on your computer you will find easyly on internet many documentation on this great program.
When using the SoundPlayerUI you MUST pass a Track that has been initialised with a supported MediaFormat.
The Widget needs to obtain the duration of the audio that it is play and that can only be done if we know the MediaFormat of the Widget.
If you pass a Track that wasn't constructed with a MediaFormat then a MediaFormatException will be thrown.
The MediaFormat must also be natively supported by the OS. See mediaformat.md for additional details on checking for a supported format.
Sounds uses Track as the primary method of handing around audio data.
You can also dynamically load a Track when the user clicks the 'Play' button on the SoundPlayerUI widget. This allows you to delay the decision on what Track is going to be played until the user clicks the 'Play' button.
How to use
Track track;

/// global key so we can pause/resume the player via the api.
var playerStateKey = GlobalKey<SoundPlayerUIState>();

void initState()
{
   track = Track.fromAsset('assets/rock.mp3', mediaFormat: Mp3MediaFormat());
}

Widget build(BuildContext build)
{
    var player = SoundPlayerUI.fromTrack(track, key: playerStateKey);
    return
        Column(child: [
            player,
            RaisedButton("Pause", onPressed: () => playerState.currentState.pause()),
            RaisedButton("Resume", onPressed: () => playerState.currentState.resume())
        ]);
}
This verb is used to get an estimation of the duration of a sound file. Be aware that it is just an estimation, based on the Codec used and the sample rate.
Note : this verb uses FFmpeg and is not available int the LITE flavor of Flutter Sound.
When using the SoundPlayerUI you MUST pass a Track that has been initialised with a supported MediaFormat.
The Widget needs to obtain the duration of the audio that it is play and that can only be done if we know the MediaFormat of the Widget.
If you pass a Track that wasn't constructed with a MediaFormat then a MediaFormatException will be thrown.
The MediaFormat must also be natively supported by the OS. See mediaformat.md for additional details on checking for a supported format.
Sounds uses Track as the primary method of handing around audio data.
You can also dynamically load a Track when the user clicks the 'Play' button on the SoundPlayerUI widget. This allows you to delay the decision on what Track is going to be played until the user clicks the 'Play' button.
How to use
Track track;

/// global key so we can pause/resume the player via the api.
var playerStateKey = GlobalKey<SoundPlayerUIState>();

void initState()
{
   track = Track.fromAsset('assets/rock.mp3', mediaFormat: Mp3MediaFormat());
}

Widget build(BuildContext build)
{
    var player = SoundPlayerUI.fromTrack(track, key: playerStateKey);
    return
        Column(child: [
            player,
            RaisedButton("Pause", onPressed: () => playerState.currentState.pause()),
            RaisedButton("Resume", onPressed: () => playerState.currentState.resume())
        ]);
}
FlutterSoundPlayer, wich deal with everything about playbacks
FlutterSoundRecorder, which deal with everything about recording
FlutterSoundHelper, which offers some convenients tools
FlutterSoundUI, which offer some Widget ready to be used out of the box
To use Flutter Sound you just do :
This will import all the necessaries dart interfaces.
Instance one ore more players. A good place to do that is in your init() function. It is also possible to instanciate the players "on the fly", when needed.
Open it. You cannot do anything on a close Player. An audio-session is then created.
Use the various verbs implemented by the players.
Instance your recorder. A good place to do that is in your init() function.
Open it. You cannot do anything on a close Recorder. An audio-session is then created.
Use the various verbs implemented by the players.
SoundPlayerUI
The τ UI Widgets.
How to use
First import the modules import 'flutter_sound.dart
The SoundPlayerUI provides a Playback widget styled after the HTML 5 audio player.
The player displays a loading indicator and allows the user to pause/resume/skip via the progress bar.
You can also pause/resume the player via an api call to SoundPlayerUI's state using a GlobalKey.
The SoundPlayerUI widget allows you to playback audio from multiple sources:
File
Asset
URL
Buffer
When using the SoundPlayerUI you MUST pass a Track that has been initialised with a supported MediaFormat.
The Widget needs to obtain the duration of the audio that it is play and that can only be done if we know the MediaFormat of the Widget.
If you pass a Track that wasn't constructed with a MediaFormat then a MediaFormatException will be thrown.
The MediaFormat must also be natively supported by the OS. See mediaformat.md for additional details on checking for a supported format.
Sounds uses as the primary method of handing around audio data.
You can also dynamically load a Track when the user clicks the 'Play' button on the SoundPlayerUI widget. This allows you to delay the decision on what Track is going to be played until the user clicks the 'Play' button.
Track track;

/// global key so we can pause/resume the player via the api.
var playerStateKey = GlobalKey<SoundPlayerUIState>();

void initState()
{
   track = Track.fromAsset('assets/rock.mp3', mediaFormat: Mp3MediaFormat());
}

Widget build(BuildContext build)
{
    var player = SoundPlayerUI.fromTrack(track, key: playerStateKey);
    return
        Column(child: [
            player,
            RaisedButton("Pause", onPressed: () => playerState.currentState.pause()),
            RaisedButton("Resume", onPressed: () => playerState.currentState.resume())
        ]);
}
A very simple example showing how to play Live Data without back pressure. It feeds a live stream, without waiting that the Futures are completed for each block. This is simpler than playing buffers synchronously because the App does not need to await that the playback for each block is completed playing another one.
This example get the data from an asset file, which is completely stupid : if an App wants to play a long asset file he must use startPlayer().
Feeding Flutter Sound without back pressure is very simple but you can have two problems :
If your App is too fast feeding the audio channel, it can have problems with the Stream memory used.
The App does not have any knowledge of when the provided block is really played.
For example, if it does a "stopPlayer()" it will loose all the buffered data.
This example uses the object to resynchronize the output stream before doing a
You do not need to instanciate the Flutter Sound Helper module. To use this module, you can just use the singleton offers by the module : flutterSoundHelper.
Example:
Duration t = await flutterSoundHelper.duration(aPathFile);
This verb is useful to convert a sound file to a new format.
infile is the file path of the file you want to convert
codecin is the actual file format
outfile is the path of the file you want to create
codecout is the new file format
Be careful : outfile and codecout must be compatible. The output file extension must be a correct file extension for the new format.
Note : this verb uses FFmpeg and is not available int the LITE flavor of Flutter Sound.
Example:
Dart definition (prototype) :
This verb is usefull to convert a Raw PCM file to a Wave file.
It adds a Wave envelop to the PCM file, so that the file can be played back with startPlayer().
Note: the parameters numChannels and sampleRateare mandatory, and must match the actual PCM data. a discussion about Raw PCM and WAVE file format.
Example:
Dart definition (prototype) :
This verb is usefull to convert a Raw PCM buffer to a Wave buffer.
It adds a Wave envelop in front of the PCM buffer, so that the file can be played back with startPlayerFromBuffer().
Note: the parameters numChannels and sampleRateare mandatory, and must match the actual PCM data. a discussion about Raw PCM and WAVE file format.
Example:
Dart definition (prototype) :
This verb is usefull to convert a Wave file to a Raw PCM file.
It removes the Wave envelop from the PCM file.
Example:
Dart definition (prototype) :
This verb is usefull to convert a Wave buffer to a Raw PCM buffer. Note that this verb is not asynchronous and does not return a Future.
It removes the Wave envelop from the PCM buffer.
Example:
Dart definition (prototype) :
This verb is used to get an estimation of the duration of a sound file. Be aware that it is just an estimation, based on the Codec used and the sample rate.
Note : this verb uses FFmpeg and is not available int the LITE flavor of Flutter Sound.
Example:
Dart definition (prototype) :
This verb is used to know during runtime if FFmpeg is linked with the App.
Example:
Dart definition (prototype) :
This verb is a wrapper for the great FFmpeg application. The command "man ffmpeg" (if you have installed ffmpeg on your computer) will give you many informations. If you do not have ffmpeg on your computer you will find easyly on internet many documentation on this great program.
Example:
Dart definition (prototype) :
This simple verb is used to get the result of the last FFmpeg command
Example:
Dart definition (prototype) :
This simple verb is used to get the output of the last FFmpeg command
Example:
Dart definition (prototype) :
This verb is used to get various informations on a file.
The informations got with FFmpegGetMediaInformation() are .
Example:
Examples
Playback From Stream (2)
A very simple example showing how to play Live Data with back pressure. It feeds a live stream, waiting that the Futures are completed for each block.
This example get the data from an asset file, which is completely stupid : if an App wants to play an asset file he must use "StartPlayerFromBuffer().
If you do not need any back pressure, you can see another simple example : . This other example is a little bit simpler because the App does not need to await the playback for each block before playing another one.
The complete example source
Examples
Widget UI
This is a Demo of an App which uses the Flutter Sound UI Widgets.
My own feeling is that this Demo is really too much complicated for doing something very simple. There is too many dependencies and too many sources.
I really hope that someone will write soon another simpler Demo App.
Map<dynamic, dynamic> info = await flutterSoundHelper.FFmpegGetMediaInformation( uri );
Examples
Sound Effects
can be very efficient to play sound effects in real time. For example in a game App. In this example, the App open the Audio Session and call startPlayerFromStream() during initialization. When it want to play a noise, it has just to call the synchronous verb feed. Very fast.
The complete example source
τ under Flutter
The τ Project under Flutter.
Flutter Sound is the first (and actually the only) implementation of the τ Project. This Flutter plugin is supported by :
iOS
Android
Examples
Flutter Sound Demo.
This is a Demo of what it is possible to do with Flutter Sound. The code of this Demo app is not so simple and unfortunately not very clean :-( .
Flutter Sound beginners : you probably should look to and
The biggest interest of this Demo is that it shows most of the features of Flutter Sound :
streamLoop() is a very simple example which connect the FlutterSoundRecorder sink to the FlutterSoundPlayer Stream. Of course, we do not play to the loudspeaker to avoid a very unpleasant Larsen effect. this example does not use a new StreamController, but use directely foodStreamController from flutter_sound_player.dart.
This is an example showing how to record to a Dart Stream. It writes all the recorded data from a Stream to a File, which is completely stupid: if an App wants to record something to a File, it must not use Streams.
The real interest of recording to a Stream is for example to feed a Speech-to-Text engine, or for processing the Live data in Dart in real time.
Maybe, one day, we will be supported by Linux, Macos, and even (why not) Windows. But this is not top of our priorities.
Demo
We actually maintain two branches for Flutter Sound :
The V5 branch (the version ^5.0.0)
The master branch (actually the version ^6.0.0)
Flutter Sound requires an iOS 10.0 SDK (or later)
Flutter Sound requires an Android 21 (or later)
Flutter Sound comes with several Demo/Examples :
The examples App is a driver which can call all the various examples.
Flutter Sound
pub version
Flutter Sound branches
SDK requirements
Examples (Demo Apps)
Installation
Flutter Sound installation.
Install
For help on adding as a dependency, view the documentation.
Flutter Sound flavors
Flutter Sound comes in two flavors :
the FULL flavor : flutter_sound
the LITE flavor : flutter_sound_lite
The big difference between the two flavors is that the LITE flavor does not have mobile_ffmpeg embedded inside. There is a huge impact on the memory used, but the LITE flavor will not be able to do :
Support some codecs like Playback OGG/OPUS on iOS or Record OGG_OPUS on iOS
Will not be able to offer some helping functions, like FlutterSoundHelper.FFmpegGetMediaInformation() or FlutterSoundHelper.duration()
Here are the size of example/demo1 iOS .ipa in Released Mode. Those numbers include everything (flutter library, application, ...) and not only Flutter Sound.
Add flutter_sound or flutter_sound_lite as a dependency in pubspec.yaml.
The actual versions are :
flutter_sound_lite: ^5.0.0 (the LTS version without FFmpeg)
flutter_sound: ^5.0.0 (the LTS version with FFmpeg embedded)
flutter_sound_lite: ^6.0.0 (the current version without FFmpeg)
or
The Flutter-Sound sources .
There is actually two branches :
V5. This is the Long Term Support (LTS) branch which is maintained under the version 5.x.x
master. This is the branch currently developed and is released under the version 6.x.x.
If you want to generate your App from the sources with a FULL flavor:
and add your dependency in your pubspec.yaml :
If you prefer to link your App with the LITE flavor :
and add your dependency in your pubspec.yaml :
flutter_sound FULL flavor makes use of flutter_ffmpeg. In contrary to Flutter Sound Version 3.x.x, in Version 4.0.x your App can be built without any Flutter-FFmpeg dependency. flutter_ffmpeg audio-lts is now embedding inside the FULL flutter_sound.
If your App needs to use FFmpeg audio package, you must use the embedded version inside flutter_sound instead of adding a new dependency in your pubspec.yaml.
If your App needs an other FFmpeg package (for example the "video" package), use the LITE flavor of Flutter Sound and add yourself the App dependency that you need.
On iOS you need to add usage descriptions to info.plist:
On Android you need to add a permission to AndroidManifest.xml:
To use Flutter Sound in a web application, you can either :
Add those 4 lines at the end of the <head> section of your index.html file :
Add those 4 lines at the end of the <head> section of your index.html file :
Please to understand how you can specify the interval of the versions you are interested by.
If you get this message (specially after the release of a new Flutter Version) :
you can try the following instructions sequence (and ignore if some commands gives errors) :
If everything good, the last pod install must not give any error.
Getting Started
Getting Started..
The complete running example
To play back something you must instanciate a player. Most of the time, you will need just one player, and you can place this instanciation in the variables initialisation of your class :
Before calling startPlayer() you must open the Session.
When you have finished with it, you must close the session. A good places to put those verbs are in the procedures initState() and dispose().
Flutter Sound on Flutter Web
Flutter Sound on web.
Flutter Sound is now supported by Flutter Web (with some limitations). Please to have informations on how to setup your App for web.
The big problem (as usual) is Apple. Webkit is bull shit : you cannot use MediaRecorder to record anything with it. It means that Flutter Sound on Safari cannot record. And because Apple forces Firefox and Chrome to use also Webkit on iOS, you cannot record anything on iOS with Flutter Sound. Apple really sucks :-(.
You can play with , but better if not Safari and not iOS if you want to record something.
Flutter Sound can play buffers with startPlayerFromBuffer()
guides
flutter_sound: ^6.0.0 (the current version with FFmpeg)
Flavor
V4.x
V5.1
LITE
16.2 MB
17.8 MB
FULL
30.7 MB
Linking your App directly from pub.dev
Linking your App with Flutter Sound sources (optional)
To play back something you must instanciate a recorder. Most of the time, you will need just one recorder, and you can place this instanciation in the variables initialisation of your class :
Before calling startRecorder() you must open the Session.
When you have finished with it, you must close the session. A god place to pute those verbs is in the procedures initState() and dispose().
To record something you call startRecorder(). To stop the recorder you call stopRecorder()
, exactly like with other platforms. Please refer to
Flutter Sound can play remote URL with startPlayer(), exactly like with other platforms. Again, refer to the codecs compatibility table
Playing from a Dart Stream with startPlayerFromStream()is not yet implemented.
Playing with UI is obviously not implemented, because we do not have control to the lock screen inside a web app.
Flutter Sound does not have control of the audio-focus.
The web App does not have access to any file system. But you can store an URL into your local SessionStorage, and use the key as if it was an audio file. This is compatible with the Flutter Sound recorder.
Flutter Sound on web cannot have access to any file system. You can use startRecorder() like others platforms, but the recorded data will be stored inside an internal HTTP object. When the recorder is stopped, startRecorder stores the URL of this object into your local sessionStorage.
Flutter Sound does not have access to the audio focus
Flutter Sound does not provide the audio peak level in the Recorder Progress events.
Actually, Flutter Sound on Web does not support FFmpeg. We are still actually not sure if we should support it or if the code weight would be too high for a Web App.
      <key>NSAppleMusicUsageDescription</key>
      <string>MyApp does not need this permission</string>
      <key>NSCalendarsUsageDescription</key>
      <string>MyApp does not need this permission</string>
      <key>NSCameraUsageDescription</key>
      <string>MyApp does not need this permission</string>
      <key>NSContactsUsageDescription</key>
      <string>MyApp does not need this permission</string>
      <key>NSLocationWhenInUseUsageDescription</key>
      <string>MyApp does not need this permission</string>
      <key>NSMotionUsageDescription</key>
      <string>MyApp does not need this permission</string>
      <key>NSSpeechRecognitionUsageDescription</key>
      <string>MyApp does not need this permission</string>
      <key>UIBackgroundModes</key>
      <array>
              <string>audio</string>
      </array>
      <key>NSMicrophoneUsageDescription</key>
      <string>MyApp uses the microphone to record your speech and convert it to text.</string>
Cocoapods could not find compatible versions for pod ...
cd ios
pod cache clean --all
rm Podfile.lock
rm -rf .symlinks/
cd ..
flutter clean
flutter pub get
cd ios
pod update
pod repo update
pod install --repo-update
pod update
pod install
cd ..
@override
  void initState() {
    super.initState();
    // Be careful : openAudioSession return a Future.
    // Do not access your FlutterSoundPlayer or FlutterSoundRecorder before the completion of the Future
    _myPlayer.openAudioSession().then((value) {
      setState(() {
        _mPlayerIsInited = true;
      });
    });
  }


  @override
  void dispose() {
    // Be careful : you must `close` the audio session when you have finished with it.
    _myPlayer.closeAudioSession();
    _myPlayer = null;
    super.dispose();
  }
@override
  void initState() {
    super.initState();
    // Be careful : openAudioSession return a Future.
    // Do not access your FlutterSoundPlayer or FlutterSoundRecorder before the completion of the Future
    _myRecorder.openAudioSession().then((value) {
      setState(() {
        _mRecorderIsInited = true;
      });
    });
  }


  @override
  void dispose() {
    // Be careful : you must `close` the audio session when you have finished with it.
    _myRecorder.closeAudioSession();
    _myRecorder = null;
    super.dispose();
  }
await startRecorder(codec: opusWebM, toFile: 'foo'); // the LocalSessionStorage key `foo` will contain the URL of the recorded object
...
await stopRecorder();
await startPlayer('foo'); // ('foo' is the LocalSessionStorage key of the recorded sound URL object)
guides_record_stream
Recording PCM-16 to a Dart Stream.
Recording PCM-16 to a Dart Stream
Please, remember that actually, Flutter Sound does not support Floating Point PCM data, nor records with more that one audio channel. On Flutter Sound, Raw PCM is only PCM-LINEAR 16 monophony
To record a Live PCM file, when calling the verb startRecorder(), you specify the parameter toStream: with you Stream sink, instead of the parameter toFile:. This parameter is a StreamSink that you can listen to, for processing the input data.
Notes :
This new functionnality needs, at least, an Android SDK >= 21
This new functionnality works better with Android minSdk >= 23, because previous SDK was not able to do UNBLOCKING write.
Example
You can look to the provided with Flutter Sound.
Supported Codecs
Supported codecs.
On mobile OS
Actually, the following codecs are supported by flutter_sound:
iOS encoder
iOS decoder
Android encoder
Android decoder
AAC ADTS
This table will eventually be upgraded when more codecs will be added.
✅ (*) : The codec is supported by Flutter Sound, but with a File Format Conversion. This has several drawbacks :
Needs FFmpeg. FFmpeg is not included in the LITE flavor of Flutter Sound
Can add some delay before Playing Back the file, or after stopping the recording. This delay can be substancial for very large records.
Webkit is bull shit : you cannot record anything with Safari, or even Firefox/Chrome on iOS.
Opus WEBM is a great Codec. It works on everything (mobile and Web Browsers), except Apple
Edge is same as Chrome
guides-pcm-wave
Raw PCM and Wave files.
Raw PCM is not an audio format. Raw PCM files store the raw data without any envelope. A simple way for playing a Raw PCM file, is to add a Wave header in front of the data before playing it. To do that, the helper verb pcmToWave() is convenient. You can also call directely the startPlayer() verb. If you do that, do not forget to provide the sampleRate and numChannels parameters.
A Wave file is just PCM data in a specific file format.
The Wave audio file format has a terrible drawback : it cannot be streamed. The Wave file is considered not valid, until it is closed. During the construction of the Wave file, it is considered as corrupted because the Wave header is still not written.
Recording or playing Raw PCM INT-Linerar 16 files
Recording PCM.
Please, remember that actually, Flutter Sound does not support Floating Point PCM data, nor records with more that one audio channel.
To record a Raw PCM16 file, you use the regular startRecorder() API verb. To play a Raw PCM16 file, you can either add a Wave header in front of the file with pcm16ToWave() verb, or call the regular startPlayer() API verb. If you do the later, you must provide the sampleRate and numChannels parameter during the call. You can look to the simple example provided with Flutter Sound. [TODO]
Example
Notification/Lock Screen
Controls on the lock-screen.
A number of Platforms (android/IOS) support the concept of a 'Shade' or 'notification' area with the ability to control audio playback via the Shade.
When using a Shade a Platform may also allow the user to control the media playback from the Platform's 'Lock' screen.
Using a Shade does not stop you from also displaying an in app Widget to control audio. The SoundPlayerUI widget will work in conjunction with the Shade.
The Shade may also display information contained in the such as Album, Artist of artwork.
A Shade often allows the user to pause and resume audio as well skip forward a track and skip backward to the prior Track.
τ allows you to enable the Shade controls when you start playback. It also allows you (where the Platform supports it) to control which of the media buttons are displayed (pause, resume, skip forward, skip backwards).
Note the following limitations in the current Flutter Sound version :
The stream is PCM-Integer Linear 16 with just one channel. Actually, Flutter Sound does not manipulate Raw PCM with floating point PCM data nor with more than one audio channel.
FlutterSoundHelper duration() does not work with Raw PCM file
startPlayer() does not return the record duration.
withUI parameter in openAudioSession() is actually incompatible with Raw PCM files.
The withShadeUIconstuctor allows you to control which of the Shade buttons are displayed. The Platform MAY choose to ignore any of the button choices you make.
If you allow the Shade to display the Skip Forward and Skip Back buttons you must provide callbacks for the onSkipForward and on onSkipBackward methods. When the user clicks the respective buttons you will receive the relevant callback.
The easiest way to start with Sounds is to use one of the built in Widgets.
SoundPlayerUI
SoundRecorderUI
RecorderPlaybackController
If you don't like any of the provided Widgets you can build your own from scratch.
The Sounds widgets are all built using the public Sounds API and also provide working examples when building your own widget.
The SoundPlayerUI widget provides a Playback widget styled after the HTML 5 audio player.
The player displays a loading indicator and allows the user to pause/resume/skip via the progress bar.
You can also pause/resume the player via an api call to SoundPlayerUI's state using a GlobalKey.
The api documentation provides examples on using the SoundPlayerUI widget.
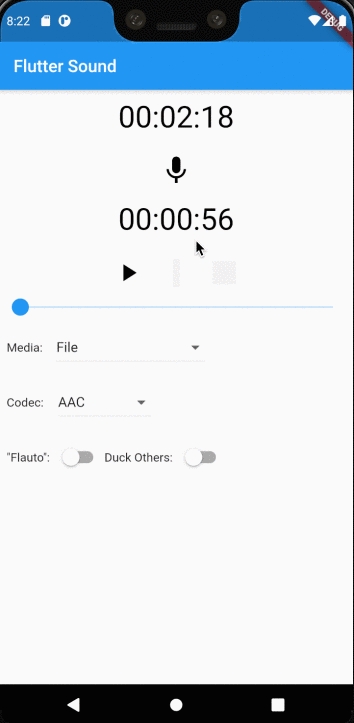
The SoundRecorderUI widget provide a simple UI for recording audio.
The audio is recorded to a .
TODO: add image here.
The api documentation provides examples on using the widget.
The RecorderPlaybackController is a specialised Widget which is used to co-ordinate a paired SoundPlayerUI and a SoundRecorderUI widgets.
Often when providing an interface to record audio you will want to allow the user to playback the audio after recording it. However you don't want the user to try and start the playback before the recording is complete.
The RecorderPlaybackController widget does not have a UI (its actually an InheritedWidget) but rather is used to as a bridge to allow the paired SoundPlayerUI and SoundRecorderUI to communicate with each other.
The RecorderPlaybackController co-ordinates the UI state between the two components so that playback and recording cannot happen at the same time.
See the API documenation on for examples of how to use it.
migration
Migration from previous version
Migration form 5.x.x to 6.x.x
Flutter Sound 6.0 FULL flavor is now linked with mobile-ffmpeg-audio 4.3.1.LTS
Flutter Sound 6.2 is linked with flutter_sound_interface 2.0.0
Flutter Sound 6.2 is linked with the Pod TauEngine 1.0.0
You must delete the file ios/Pofile.lock in your App directory and execute the command :
Several changes are necessary to migrate from 4.x.x :
To be compliant with Google recommandations, Flutter Sound has now a main dart file that the App must import : flutter_sound.dart. This file is just a list of "exports" from the various dart files present in the "src" sub-directory.
Global enums are renamed to be compliant with the Google CamelCase recommandations :
t_CODECS is renamed Codec. The Codec values are LowerCase, followed by the File Format in Uppercase when there is ambiguity :
aacADTS
Now this is the App responsability to request the Recording permission if needed. This change was necessary for several reasons :
Several App want to manage themselves the permission
We had some problems with the Flutter Android Embedded V2
We had problems when Flutter Sound uses permission_handler 4.x and the App needs permission_handler 5.x
The parameter requestPermission is removed from the startRecorder() parameters. The permission_handler dependency is removed from Flutter Sound pubspec.yaml
Flutter Sound does not create anymore files without the App specifying its path. This was a legacy parameter. The first versions of Flutter Sound created files on the SD-card volume. This was really bad for many reasons and later versions of Flutter Sound stored its files in a temporary directory.
Flutter Sound Version 5.x.x does not try any more to store files in a temporary directory by itself. Thanks to that, Flutter Sound does not have any more a dependency to path_provider. It is now the App responsability to depend on path_provider if it wants to access the Temporary Storage.
We removed OS specific parameters passed during startRecorder() :
AndroidEncoder
AndroidAudioSource
AndroidOutputFormat
This NULL parameter sent when the Recorder or the Player was closed was ugly, and caused many bugs to some Apps.
The Audio Focus is just abandoned automaticaly when the App does a release()
The ancient verb setActive is now replaced by setAudioFocus
initialized() and release() are rename openAudioSession() and closeAudioSession())
openAudioSessionWithUI is a new verb to open an Audio Session if the App wants to be controlled from the lock-screen. This replace the module TrackPlayer which does not exists anymore.
There is no changes in the 4.x.x version API. But some modifications are necessary in your configuration files
The FULL flavor of Flutter Sound makes use of flutter_ffmpeg. In contrary to Flutter Sound Version 3.x.x, in Version 4.0.x your App can be built without any Flutter-FFmpeg dependency.
If you come from Flutter Sound Version 3.x.x, you must :
Remove this dependency from your pubspec.yaml.
You must also delete the line ext.flutterFFmpegPackage = 'audio-lts' from your android/build.gradle
If you do not do that, you will have duplicates modules during your App building.
flutter_ffmpeg audio-lts is now embedding inside the FULL flavor of Flutter Sound. If your App needs to use FFmpeg, you must use the embedded version inside flutter_sound instead of adding a new dependency in your pubspec.yaml.
guides
Various guides about The τ Project.
Actually, the following codecs are supported by flutter_sound:
guides_play_from_stream
Playing PCM-16 from a Dart Stream.
Please, remember that actually, Flutter Sound does not support Floating Point PCM data, nor records with more that one audio channel.
To play live stream, you start playing with the verb startPlayerFromStream() instead of the regular startPlayer() verb:
The first thing you have to do if you want to play live audio is to answer this question: Do I need back pressure from Flutter Sound, or not?
The App does just myPlayer.foodSink.add( FoodData(aBuffer) ) each time it wants to play some data. No need to await, no need to verify if the previous buffers have finished to be played. All the buffers added to foodSink
τ under React Native
the-tau-project
pages
opusOGG
opusCAF
mp3
vorbisOGG
pcm16
pcm16WAV
pcm16AIFF
pcm16CAF
flac
aacMP4
The Player State is renamed PlayerState
The Recorder State is renamed RecorderState
The iOS Session Category is renamed SessionCategory
The iOS Session Mode is rename SessionMode
The Android Focus Gain is renamed AndroidFocusGain
We had problems when Flutter Sound uses permission_handler 5.x and the App needs permission_handler 4.x
This is not Flutter Sound role to do UI interface
IosQuality
And the special line pod name+'/audio-lts', :path => File.join(symlink, 'ios') in your Podfile.
Migration form 4.x.x to 5.x.x
Imports
Global enums and Function types
Flutter Sound does not manage any more the recording permissions.
The StartRecorder() "path" parameter is now mandatory
StartRecorder() OS specific parameters are removed
Flutter Sound does not post NULL to Player and Recorder subscriptions.
The Audio Focus is not automaticaly abandoned between two startPlayer() or two startRecorder()
Some verbs are renamed :
openAudioSessionWithUI
Migration from 3.x.x to 4.x.x
pod cache clean --all
pod install --repo-update
✅
✅ (1)
✅
Opus OGG
✅ (*)
✅ (*)
❌
✅ (1)
Opus CAF
✅
✅
❌
✅ (*) (1)
MP3
❌
✅
❌
✅
Vorbis OGG
❌
❌
❌
✅
PCM16
✅
✅
✅ (1)
✅
PCM Wave
✅
✅
✅ (1)
✅
PCM AIFF
❌
✅
❌
✅ (*)
PCM CAF
✅
✅
❌
✅ (*)
FLAC
✅
✅
❌
✅
AAC MP4
✅
✅
✅ (1)
✅
AMR NB
❌
❌
✅ (1)
✅
AMR WB
❌
❌
✅ (1)
✅
PCM8
❌
❌
❌
❌
PCM F32
❌
❌
❌
❌
PCM WEBM
❌
❌
❌
❌
Opus WEBM
❌
❌
✅
✅
Vorbis WEBM
❌
❌
❌
✅
This table will eventually be upgraded when more codecs will be added.
✅ (*) : The codec is supported by Flutter Sound, but with a File Format Conversion. This has several drawbacks :
Needs FFmpeg. FFmpeg is not included in the LITE flavor of Flutter Sound
Can add some delay before Playing Back the file, or after stopping the recording. This delay can be substancial for very large records.
✅ (1) : needs MinSDK >=23
Chrome encoder
Chrome decoder
Firefox encoder
Firefox decoder
Webkit encoder (safari)
Webkit decoder (Safari)
AAC ADTS
Webkit is bull shit : you cannot record anything with Safari, or even Firefox/Chrome on iOS.
Opus WEBM is a great Codec. It works on everything (mobile and Web Browsers), except Apple
Edge is same as Chrome
Raw PCM is not an audio format. Raw PCM files store the raw data without any envelope. A simple way for playing a Raw PCM file, is to add a Wave header in front of the data before playing it. To do that, the helper verb pcmToWave() is convenient. You can also call directely the startPlayer() verb. If you do that, do not forget to provide the sampleRate and numChannels parameters.
A Wave file is just PCM data in a specific file format.
The Wave audio file format has a terrible drawback : it cannot be streamed. The Wave file is considered not valid, until it is closed. During the construction of the Wave file, it is considered as corrupted because the Wave header is still not written.
Note the following limitations in the current Flutter Sound version :
The stream is PCM-Integer Linear 16 with just one channel. Actually, Flutter Sound does not manipulate Raw PCM with floating point PCM data nor with more than one audio channel.
FlutterSoundHelper duration() does not work with Raw PCM file
startPlayer() does not return the record duration.
withUI parameter in openAudioSession() is actually incompatible with Raw PCM files.
Please, remember that actually, Flutter Sound does not support Floating Point PCM data, nor records with more that one audio channel.
To record a Raw PCM16 file, you use the regular startRecorder() API verb. To play a Raw PCM16 file, you can either add a Wave header in front of the file with pcm16ToWave() verb, or call the regular startPlayer() API verb. If you do the later, you must provide the sampleRate and numChannels parameter during the call. You can look to the simple example provided with Flutter Sound. [TODO]
Example
Please, remember that actually, Flutter Sound does not support Floating Point PCM data, nor records with more that one audio channel. On Flutter Sound, Raw PCM is only PCM-LINEAR 16 monophony
To record a Live PCM file, when calling the verb startRecorder\(\), you specify the parameter toStream: with you Stream sink, instead of the parameter toFile:. This parameter is a StreamSink that you can listen to, for processing the input data.
This new functionnality needs, at least, an Android SDK >= 21
This new functionnality works better with Android minSdk >= 23, because previous SDK was not able to do UNBLOCKING write.
Example
You can look to the simple example provided with Flutter Sound.
Please, remember that actually, Flutter Sound does not support Floating Point PCM data, nor records with more that one audio channel.
To play live stream, you start playing with the verb startPlayerFromStream instead of the regular startPlayer() verb:
The first thing you have to do if you want to play live audio is to answer this question: Do I need back pressure from Flutter Sound, or not?
The App does just myPlayer.foodSink.add\( FoodData\(aBuffer\) \) each time it wants to play some data. No need to await, no need to verify if the previous buffers have finished to be played. All the buffers added to foodSink are buffered, an are played sequentially. The App continues to work without knowing when the buffers are really played.
This means two things :
If the App is very fast adding buffers to foodSink it can consume a lot of memory for the waiting buffers.
When the App has finished feeding the sink, it cannot just do myPlayer.stopPlayer(), because there is perhaps many buffers not yet played.
If it does a stopPlayer(), all the waiting buffers will be flushed which is probably not what it wants.
But there is a mechanism if the App wants to resynchronize with the output Stream. To resynchronize with the current playback, the App does myPlayer.foodSink.add\( FoodEvent\(aCallback\) \);
Example:
You can look to this simple example provided with Flutter Sound.
If the App wants to keep synchronization with what is played, it uses the verb feedFromStream to play data. It is really very important not to call another feedFromStream() before the completion of the previous future. When each Future is completed, the App can be sure that the provided data are correctely either played, or at least put in low level internal buffers, and it knows that it is safe to do another one.
await myPlayer.startPlayerFromStream
(
    codec: Codec.pcm16 // Actually this is the only codec possible
    numChannels: 1 // Actually this is the only value possible. You cannot have several channels.
    sampleRate: 48100 // This parameter is very important if you want to specify your own sample rate
);
are buffered, an are played sequentially. The App continues to work without knowing when the buffers are really played.
This means two things :
If the App is very fast adding buffers to foodSink it can consume a lot of memory for the waiting buffers.
When the App has finished feeding the sink, it cannot just do myPlayer.stopPlayer(), because there is perhaps many buffers not yet played.
If it does a stopPlayer(), all the waiting buffers will be flushed which is probably not what it wants.
But there is a mechanism if the App wants to resynchronize with the output Stream. To resynchronize with the current playback, the App does myPlayer.foodSink.add( FoodEvent(aCallback) );
Example:
You can look to this simple example provided with Flutter Sound.
If the App wants to keep synchronization with what is played, it uses the verb feedFromStream() to play data. It is really very important not to call another feedFromStream() before the completion of the previous future. When each Future is completed, the App can be sure that the provided data are correctely either played, or at least put in low level internal buffers, and it knows that it is safe to do another one.
You probably will await or use then() for each call to feedFromStream().
This new functionnality needs, at least, an Android SDK >= 21
This new functionnality works better with Android minSdk >= 23, because previous SDK was not able to do UNBLOCKING write.
Examples You can look to the provided examples :
This example shows how to play Live data, with Back Pressure from Flutter Sound
This example shows how to play Live data, without Back Pressure from Flutter Sound
This example shows how to play some real time sound effects.
play live stream what is recorded from the microphone.
await myPlayer.startPlayerFromStream
(
    codec: Codec.pcm16 // Actually this is the only codec possible
    numChannels: 1 // Actually this is the only value possible. You cannot have several channels.
    sampleRate: 48100 // This parameter is very important if you want to specify your own sample rate
);
               GNU LESSER GENERAL PUBLIC LICENSE
                   Version 3, 29 June 2007
Copyright (C) 2007 Free Software Foundation, Inc. https://fsf.org/ Everyone is permitted to copy and distribute verbatim copies of this license document, but changing it is not allowed.
This version of the GNU Lesser General Public License incorporates the terms and conditions of version 3 of the GNU General Public License, supplemented by the additional permissions listed below.
Additional Definitions.
As used herein, "this License" refers to version 3 of the GNU Lesser General Public License, and the "GNU GPL" refers to version 3 of the GNU General Public License.
"The Library" refers to a covered work governed by this License, other than an Application or a Combined Work as defined below.
An "Application" is any work that makes use of an interface provided by the Library, but which is not otherwise based on the Library. Defining a subclass of a class defined by the Library is deemed a mode of using an interface provided by the Library.
A "Combined Work" is a work produced by combining or linking an Application with the Library. The particular version of the Library with which the Combined Work was made is also called the "Linked Version".
The "Minimal Corresponding Source" for a Combined Work means the Corresponding Source for the Combined Work, excluding any source code for portions of the Combined Work that, considered in isolation, are based on the Application, and not on the Linked Version.
The "Corresponding Application Code" for a Combined Work means the object code and/or source code for the Application, including any data and utility programs needed for reproducing the Combined Work from the Application, but excluding the System Libraries of the Combined Work.
Exception to Section 3 of the GNU GPL.
You may convey a covered work under sections 3 and 4 of this License without being bound by section 3 of the GNU GPL.
Conveying Modified Versions.
If you modify a copy of the Library, and, in your modifications, a facility refers to a function or data to be supplied by an Application that uses the facility (other than as an argument passed when the facility is invoked), then you may convey a copy of the modified version:
a) under this License, provided that you make a good faith effort to ensure that, in the event an Application does not supply the function or data, the facility still operates, and performs whatever part of its purpose remains meaningful, or
b) under the GNU GPL, with none of the additional permissions of this License applicable to that copy.
Object Code Incorporating Material from Library Header Files.
The object code form of an Application may incorporate material from a header file that is part of the Library. You may convey such object code under terms of your choice, provided that, if the incorporated material is not limited to numerical parameters, data structure layouts and accessors, or small macros, inline functions and templates (ten or fewer lines in length), you do both of the following:
a) Give prominent notice with each copy of the object code that the Library is used in it and that the Library and its use are covered by this License.
b) Accompany the object code with a copy of the GNU GPL and this license document.
Combined Works.
You may convey a Combined Work under terms of your choice that, taken together, effectively do not restrict modification of the portions of the Library contained in the Combined Work and reverse engineering for debugging such modifications, if you also do each of the following:
a) Give prominent notice with each copy of the Combined Work that the Library is used in it and that the Library and its use are covered by this License.
b) Accompany the Combined Work with a copy of the GNU GPL and this license document.
c) For a Combined Work that displays copyright notices during execution, include the copyright notice for the Library among these notices, as well as a reference directing the user to the copies of the GNU GPL and this license document.
Combined Libraries.
You may place library facilities that are a work based on the Library side by side in a single library together with other library facilities that are not Applications and are not covered by this License, and convey such a combined library under terms of your choice, if you do both of the following:
a) Accompany the combined library with a copy of the same work based on the Library, uncombined with any other library facilities, conveyed under the terms of this License.
b) Give prominent notice with the combined library that part of it is a work based on the Library, and explaining where to find the accompanying uncombined form of the same work.
Revised Versions of the GNU Lesser General Public License.
The Free Software Foundation may publish revised and/or new versions of the GNU Lesser General Public License from time to time. Such new versions will be similar in spirit to the present version, but may differ in detail to address new problems or concerns.
Each version is given a distinguishing version number. If the Library as you received it specifies that a certain numbered version of the GNU Lesser General Public License "or any later version" applies to it, you have the option of following the terms and conditions either of that published version or of any later version published by the Free Software Foundation. If the Library as you received it does not specify a version number of the GNU Lesser General Public License, you may choose any version of the GNU Lesser General Public License ever published by the Free Software Foundation.
If the Library as you received it specifies that a proxy can decide whether future versions of the GNU Lesser General Public License shall apply, that proxy's public statement of acceptance of any version is permanent authorization for you to choose that version for the Library.
Contributions
We need you!
Flutter Sound is a free and Open Source project. Several contributors have already contributed to Flutter Sound. Specially :
@hyochan who is the Flutter Sound father
@salvatore373 who wrote the Track Player
The τ architecture
On this diagram, we can see clearly the three layers :
This is the highest layer. This layer must implement the various platforms/frameworks that τ wants to support.
Actually the only platform is Flutter. Maybe in the future we will have others :
React Native
d) Do one of the following:
0) Convey the Minimal Corresponding Source under the terms of this License, and the Corresponding Application Code in a form suitable for, and under terms that permit, the user to recombine or relink the Application with a modified version of the Linked Version to produce a modified Combined Work, in the manner specified by section 6 of the GNU GPL for conveying Corresponding Source.
1) Use a suitable shared library mechanism for linking with the Library. A suitable mechanism is one that (a) uses at run time a copy of the Library already present on the user's computer system, and (b) will operate properly with a modified version of the Library that is interface-compatible with the Linked Version.
e) Provide Installation Information, but only if you would otherwise be required to provide such information under section 6 of the GNU GPL, and only to the extent that such information is necessary to install and execute a modified version of the Combined Work produced by recombining or relinking the Application with a modified version of the Linked Version. (If you use option 4d0, the Installation Information must accompany the Minimal Corresponding Source and Corresponding Application Code. If you use option 4d1, you must provide the Installation Information in the manner specified by section 6 of the GNU GPL for conveying Corresponding Source.)
@bsutton who wrote the UI Widgets
@larpoux who add several codec supports
We really need your contributions. Pull Requests are welcome and will be considered very carefully.
This layer is independant of the target OS. The API is general enough to accomodate various target OS.
This is the lowest layer. this layer must implement the various target OS that τ wants to support.
Actually the OS supported are :
Android
iOS
Web
Maybe in the future we will have others :
Linux
Windows
MacOS
This layer is independant of the platforms/frameworks that τ wants to be supported by.
The middle layer is the interface between the two other layers. This middle layer must be as thin as possible. Its purpose is just for doing an interface. No real processing mus be done in this layer
Flutter Sound is published on pub.dev under the project flutter_sound (or flauto) and flutter_sound_lite (or flauto_lite).
The Flutter Sound Platform Interface is published on pub.dev under the project flutter_sound_platform_interface (or flauto_platform_interface ).
The Flutter Web plugin is published on pub.dev under the project flutter_sound_web (or flauto_web).
The τ Core for Android is published on Bintray (jcenter()) under the project tau_sound_core (or tau_core).
The τ Core for iOS is published on Cocoapods under the project tau_sound_core (or tau_core).
The τ Core for Web is published on npm under the project tau_sound_core (or tau_core).